In one of my recent deployments, the customer asked to keep the existing naming convention of his domain, keeping it as “SRV_SVC_01.domain.local”. If you’ve been around long enough, you know that names that contain underscores ( _ ) are a little frowned upon. Windows will ask you if you really want to use this name when you changed the machine’s name, but will let you go through with it.
The bigger issue started when I tried configuring an IIS ARR web farm on to publish an Office Web Apps Server for this one. IIS will not accept underscores in names so that presented an issue. Also, the Office Web Apps server was already configured and published in the topology so changing the name now wasn’t really an option. Usually I’ll just create some random name and add that to the host file on the IIS ARR box, but since we’re using HTTPS here, the published name (the name the IIS ARR machine is accessing) must natch the name on the certificate. The only solution I though of was to use a multi SAN certificate.
By default, requesting a domain certificate sing the IIS wizard will generate a certificate with the server’s CN and you’ll be able to bind this to the HTTPS port of the server. Unfortunately, there’s no way to add additional names to this request.
The workaround – Manually submit a Web Server certificate request.
Let’s cover these steps:
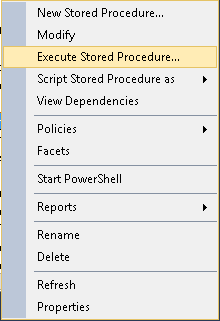
Open the local machine’s certificate console and request a new certificate:

Run through the next screens until you reach the certificate template choice. Most of the odds are you’ll see this:

Hit “Show all templates” and scroll down to “Web Server”, you won’t be happy to see the following:
 Well, how do we do that now…
Log on to your CA and open the Certification Authority management console, scroll down to “Certificate Templates”, right-click it and choose “Manage”:
 On the new “Certificate Template Console”, locate your Web Server template, right-click it and choose “Properties”:

On the Web Server window, click the Security tab. Add the Computer you’re trying to enroll the certificate for (user accounts can’t be used here since we’re enrolling on behalf of the machine), then tick the “Enroll” box:

Now go back to the machine and try to re-enroll the certificate; You’ll see that you now have the Web Server certificate template available:

Tick Web Server certificate box and click on the “More information required….” link.
In the new window, do the following:
For the Subject Name – choose “Common name” for “Type” and enter your server’s FQDN in the value field, than click “Add”.
For Alternative names – choose DNS and enter the FQDN (or FQDNs) you’d like to use in the value field and click “Add”:

When done, click OK and then “Enroll” on the next window. This will initiate the certificate request. When enrolled. you’ll see the following:

You’ll now see the certificate in the Personal certificate store of the machine: