As Office 365 is becoming more and more popular with larger organizations, many Lync \ S4B customers would like to host their voicemail in the cloud. This post will guide you through the steps required to configure Hosted UM on Office 365 for an on premises Lync deployment.
Considering you have a full Lync \ S4B 2013 enterprise voice solution already deployed in you organization, additional prerequisites for this would be:
- A Lync 2013 Edge server.
- A spare DDI number for Subscriber Access (Outlook Voice Access).
- On premises users must be synced to Office 365 by either DirSync or Azure.
- Office 365 Exchange Online licensing that allows UM.
- administrative permissions on both the on premises Lync side ad the Office 365 management portal.
It took 7 days to create the world, and seven steps to configure voice mail:
1. Office 365 Admin Center
From the Admin drop-down menu, choose “Exchange”:

Under “Exchange” choose “Unified Messaging”:

In “UM Dial plans”, click the ‘+’ sign to add a new dial plan:

In the new UM Dial Plan window:
- Give your dial plan a name.
- Configure the extension digit length as used in your organization (In my case: 4).
- In Dial plan type: Always choose SIP URI.
- Choose your Audio Language.
- Enter your country code (No ‘+’, just the code),

Click “Save”, the window will close.
You now have a new Dial plan, click “Configure” to continue:
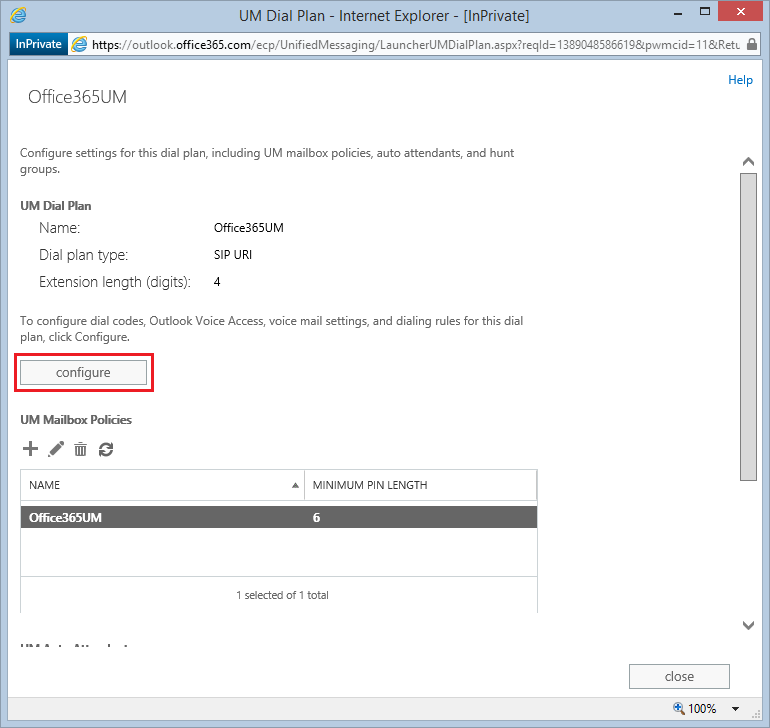
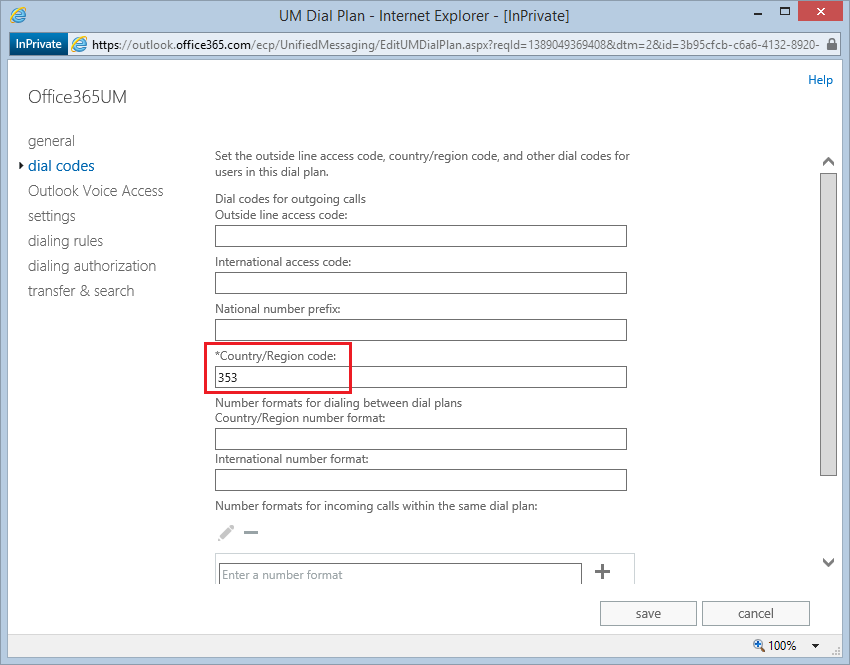
This will open a new window. View your settings in the “General” page. These are not changeable, so if you made a mistake, now would be a good time to start things over.

If it’s ok – continue to “dial codes” and enter your country\region code. In my case: 353.

Continue to Outlook Voice Access.
Keep the default greeting and announcement unless you have a pre-recorded file, and go to “E.164 routing numbers for your SIP server”. This is where you enter your Subscriber Access number in an E.164 format. In my case: “+35315556789”.
On the next box, “Outlook Voice Access numbers”, enter the number you entered for the previous box, and the regular display number (e.g. 015556789). Reason is that Outlook voice Access will only correspond to matching numbers, and you would like to have this configured as well:

Next, go to “Settings” and configure as desired:

Continue to Dialing rules: You can leave this as it is, or add a rule to allow Outlook to play on phone:
Click the ‘+’ sign to add a new dialing rule:

In the new Dialing rule window:
- Name your rule.
- Add ‘*’ in “Number pattern” and “Dialed Number”:

Click “OK” to save and go to “Dialing Authorization”. Click the ‘+’ button to add:

And choose the previously created rule:

In “Transfer and Search”, I normally change the “Allow callers to search…” to “In the entire organization”:

Click “Save”, and this part of the configuration is done!
2. On premises Lync Server
We’ll be using mostly PowerShell (Lync Management Shell) to configure this. Not a big deal, just make sure you double-check everything for typos…
Start with finding out your current configuration. From an elevated Lync Management Shell, run the following command:
Get-CsAccessEdgeConfiguration
You’re looking for the following parameters:
- AllowFederatedUsers (Should be set to True).
- EnablePartnerDiscovery (Should be set to True).
- RoutingMethod (Should be set to UseDnsSrvRouting)
Should look like this:

If one of the parameters is missing, run the following command:
Set-CsAccessEdgeConfiguration -AllowFederatedUsers $true -EnablePartnerDiscovery $true -UseDnsSrvRouting
Now, add Office 365 Exchange Online as a new hosting provider:
New-CsHostingProvider -Identity “Exchange Online” -Enabled $True -EnabledSharedAddressSpace $True -HostsOCSUsers $False -ProxyFqdn “exap.um.outlook.com” -IsLocal $False -VerificationLevel UseSourceVerification
This has configured your Edge server to be able to communicate with Office 365.
Verify that it’s replicated to the Edge server by running:
Get-CsManagementStoreReplicationStatus (If replicated to all, should be “UpToDate: True” on all servers),
and last, check that it’s configured and displayed correctly by running:
Get-CsHostingProvider -LocalStore, this should be the result:

3. Office 365 Management Shell
To continue configuring Lync on premises, we need some details about the Office 365 domains and tenants.
To do so, open a new elevated PowerShell window and connect to Office 365 using the following steps:
Run: $cred = Get-Credential and press Enter.
This will pop up a credential prompt, enter your Office 365 administrator credentials and press Ok:

Next, run the following command:
$365 = New-PSSession -ConfigurationName Microsoft.Exchange -ConnectionUri https://ps.outlook.com/powershell -Credential $cred -Authentication Basic –AllowRedirection
This will connect you to Office 365. You might receive a warning saying “WARNING: Your connection has been redirected to the following URI:
“https://pod51048psh.outlook.com/powershell-liveid?PSVersion=3.0 ““, This is normal.
Last, run:
$importresults = Import-PSSession $365
You should end up with an output similar to this:

Now that you’re connected to Office 365, run: Get-Mailbox, to see you recognize what’s going on, and then run: Get-AcceptedDomain. Now let’s pause here for a second:
Take a good look at your domain list. What we’re looking for is the original “.OnMicrosoft.com” domain. This is the one we’re going to use to communicate with Office 365.
Find that domain and mark it:

Whatever your domain is (for example: y0av.onmicrosoft.com), this is what we’ll use in the following steps:
4. Back to Lync Management Shell
Now that we know our “OnMicrosoft” domain, we can configure Lync to communicate with it:
First, we’ll create a new Hosted Voicemail Policy. From Lync Management Sell, run the following:
New-CsHostedVoicemailPolicy -identity Office365UM -Destination exap.um.outlook.com -Description “Office 365 Voicemail” -Organization “YOURDOMAIN.onmicrosoft.com”
Make sure you replaced “YOURDOMAIN” with your domain!
Next step: create a Lync-Exchange contact:
New-csexumcontact -displaynumber <E.164Number>–sipaddress <SIP:Ex365UM@Domain.com> -registrarpool <LyncFE> -ou “<YourDesiredOU>"
So for example, these are my details:
- Display Number: +35315556789 (This is the Subscriber Access Number we used on Exchange Online earlier)
- Contact’s SIP address: Ex365UM@y0av.com
- Lync registrar: LyncFE01.y0av.local
- OU: Lync Devices
My command would look like this:
New-csexumcontact -displaynumber +35315556789 –sipaddress SIP:Ex365UM@y0av.com -registrarpool LyncFE01.y0av.local -ou “OU=Lync Devices,DC=y0av,DC=local"
Once running this command, you’ll get an output with the contact’s details. Note the contact’s GUID:

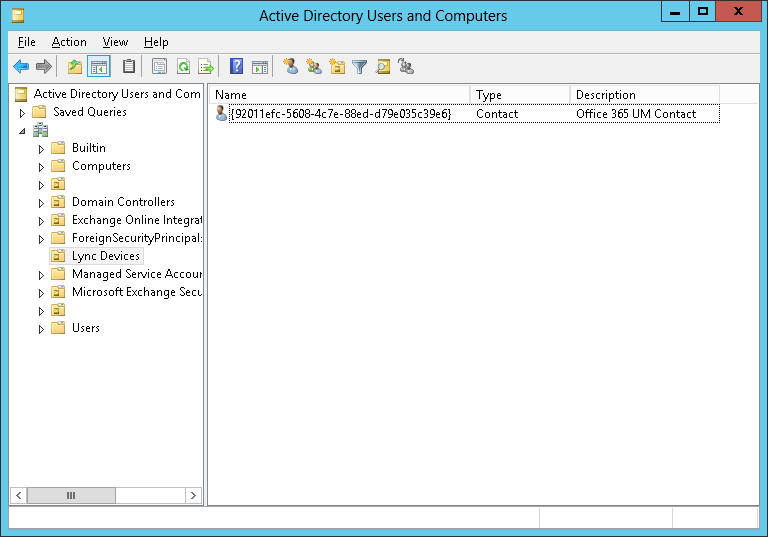
This is also found in Active Directory where you created it:
I usually add a description to this contact, as Sys Admins sometimes delete strings they’re not familiar with…

Copy the contact’s identity from PowerShell and use it in the following command to grant the policy you created earlier to the user you just created:
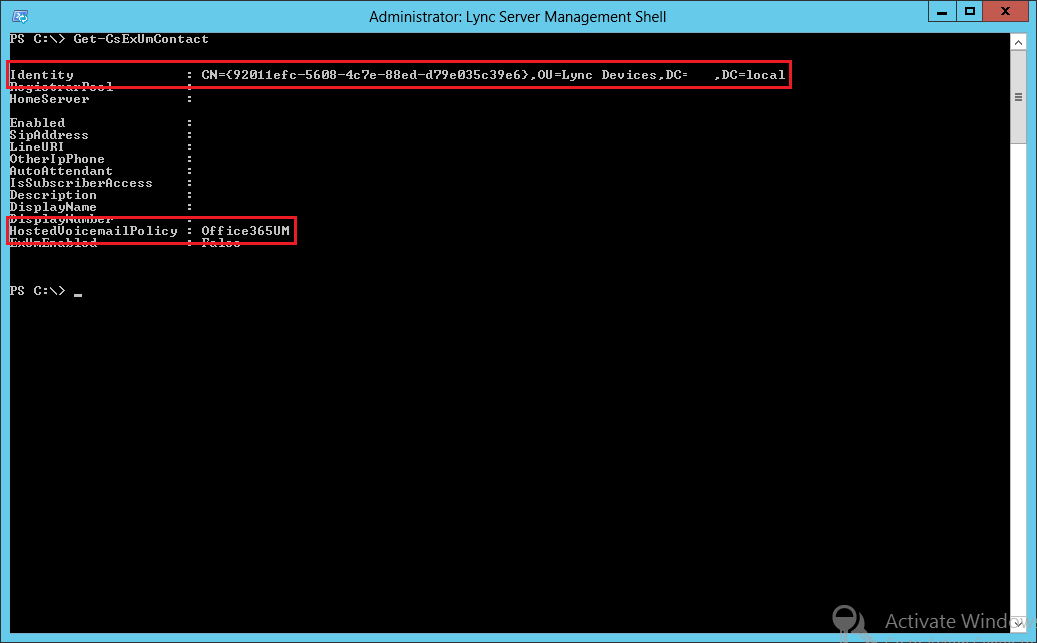
Grant-cshostedvoicemailpolicy –identity “CN={92011efc-5608-4c7e-88ed-d79e035c39e6},OU=Lync Devices,DC=y0av,DC=local” –policyname Office365UM
So now we have a UM Policy, and a UM Contact that’s configured with that policy. You can run Get-CsExUmContact to check that:
5. Back to Office 365 Management Shell…
Last thing we need to do before it works, is connect the on premises and the cloud voice policies.
So from the previously used Office 365 Management Shell window, run the following:
Set-UMmailboxpolicy -identity “CloudUMPolicy” -SourceForestPolicyNames “OnPremUMPolicy”
In this scenario we used the same name for both policies – that’ll work too:
Set-UMmailboxpolicy -identity “Office365UM” -SourceForestPolicyNames “Office365UM”
But if you have a different name for each policy – configure that as desired.
6. Back to Lync Management Shell – last time!
The only thing left to do now is grant Lync users with the new hosted voicemail policy and enable them for hosted UM.
You can use any pipe known to humanity to do this, but here’s the basics:
To grant the policy to a user, run:
Grant-cshostedvoicemailpolicy –identity LocalDomain\y0av –policyname Office365UM
To enable the user for Hosted Voicemail, run:
Set-csuser –identity LocalDomain\y0av –hostedvoicemail $true
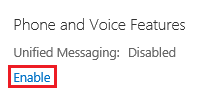
7. Enable the user for UM
Log on to the Office 365 admin center and enable the user for Unified messaging:

Assign the UM policy you created earlier:

Verify the details on the next screen and that’s it. You’ve voice mail configured.
If you’re having issues enabling users, you might want to check the “Notes from the field” post I published after getting some feedback on this post.