Lync Server 2013 CU1 brought great news with it: Finally, Lync users can now pick-up calls on behalf of other users, when these are either away from their desk or in a call.
The configuration is done mostly (Forget it, entirely) by PowerShell and Command prompt.
To begin, you’ll need two major components:
- The Lync Server 2013 CU1 installed on your servers. (Download)
- The Microsoft Lync Server 2013 Resource Kit Tools. (Download)
Let’s start with the simple stuff:
Call pick-ups uses the same mechanism as Call parks to enable other users to fetch the call. So we’ll have to create a “Call Park Orbit”. The great advantage here is that we don’t have to use actual extensions, and anyway users are used to dial weird combinations like “#1250” or “*001” to fetch calls.
We now can assign numbers beginning with “#” or “*”, as long as we have at least three digits to follow, e.g: “#100”, or “*555”.
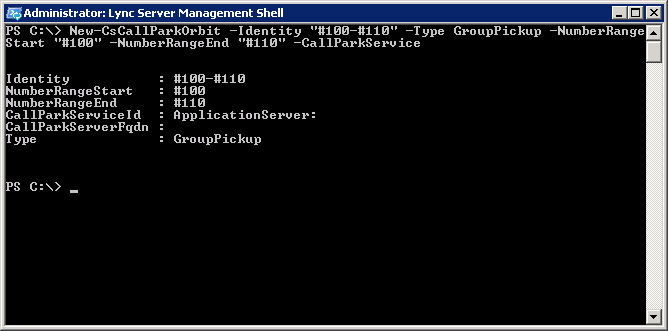
To create a new Call pick-up orbit, run the following command from Lync 2013 Management Shell:
New-CsCallParkOrbit -Identity "<Give it a name>" -Type GroupPickup -NumberRangeStart "#100" -NumberRangeEnd "#110" -CallParkService "<FEPool.doamin.local>"
Note you can assign any numbers you want to “NumberRangeStart” and “NumberRangeEnd“.
It should be something like this:
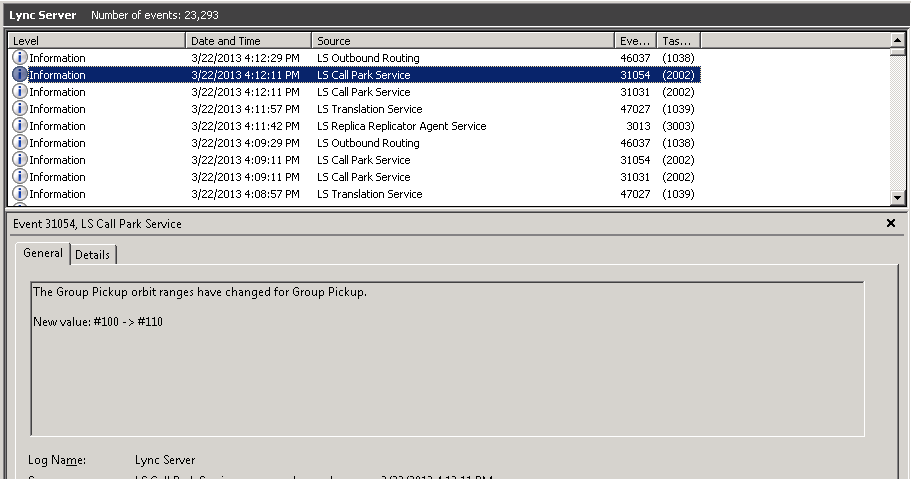
If you did it right you should see event ID 31054 in the Lync Server event viewer:
Now the fun begins:
The application we use to configure the Call Pick-up can be found in the Lync Server 2013 Resource Kit. It’s called “SEFAUtil.exe” (Secondary Extension Feature Activation) and has to be run as a Trusted Application. This is where things get a little messy – We cannot use our Front-End severs for that (You wouldn’t want to configure your FE server as a Trusted Pool, nor it is supported by Microsoft), so you’ll have to use another server for that.
To configure the trusted application pool, run the following command from one of your Front-End servers:
New-CsTrustedApplicationPool -Identity "<Chosen Servers' Name>" -Registrar "<FEPool.doamin.local>" -Site "<Your site's name>"
The server will ask you to run “Enable-CsTopology“. Hang on with that…
Within the trusted application pool, you have to configure the trusted application. The name of the application MUST be “SEFAUtil”, as the command shows:
New-CsTrustedApplication –ApplicationId "sefautil" –TrustedApplicationPoolFqdn "<The server from the previous stage>" -Port xxxx
You can use any port you’d like. (Try not to use 25, 80, 443, etc…)
Now, run “Enable-CsTopology” and wait for the replication to occur.
Now – we’re ready to assign users with the new feature:
On the server that you have designated as the Trusted application pool, install the Lync Server 2013 Resource Kit.
From an elevated Command prompt or PowerShell, go to “C:\Program Files\Microsoft Lync Server 2013\ResKit“.
First: let’s test SEFAutil.exe. Gladly, it works in a very simple way: If it works – It will give you an output. If it’s not working – You’ll get a blank new line… That’s all there is to it. So to test, run the following command:
sefautil.exe /server:<Your Registrar> <user's SIP address>
To be clear: let’s say your user’s sip address is “Donald@Duck.com” and he’s located on registrar “Dazy.duck.local”, your command should be as follows:
sefautil.exe /server:Dazy.duck.local Donald@Duck.com
Always use the user’s sip address, not their UPN.
If you typed the command correctly and the application is trusted, you’ll get a reply from the server looking like this:
PS C:\Program Files\Microsoft Lync Server 2013\ResKit> .\SEFAUtil.exe /server:Dazy.duck.local Donald@Duck.com
User Aor: sip:Donald@Duck.com
Display Name: Donald Duck
UM Enabled: True
Simulring enabled: False
User Ring time: 00:00:20
Call Forward No Answer to: voicemail
PS C:\Program Files\Microsoft Lync Server 2013\ResKit>
If you got no output – Check your trusted apps or typing.
Now: Let’s say you want to enable all users to fetch calls directed to the user “Donald@Duck.com”. Just use the following command:
SEFAUtil.exe /enablegrouppickup:"#110" /server:Dazy.duck.local Donald@Duck.com
Your output’s last line should say: Group Pickup Orbit: sip:#110;phone-context=user-default@Duck.com;user=phone
Now, try calling this user, and from another phone, dial #110. The call will be redirected and automatically answered by you.
You’re good to go!

Thanks for posting this.
We have tried this internally and it is working perfectly.